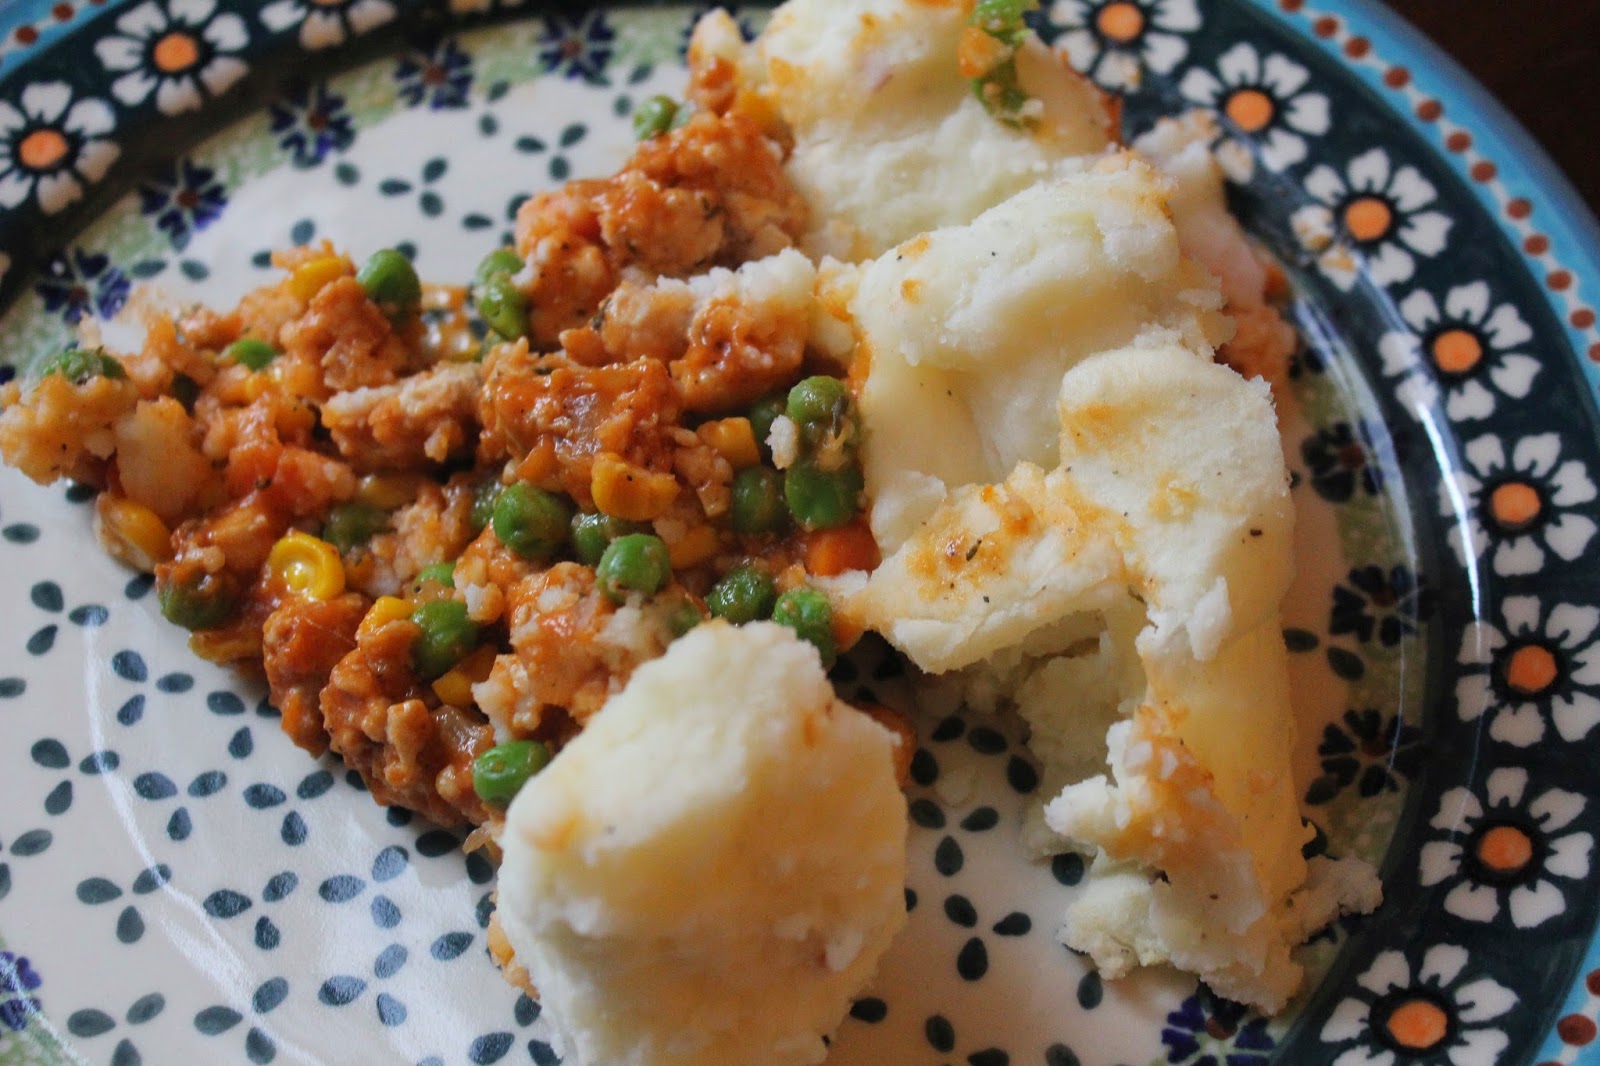
Wednesday, July 30, 2014

Arthur Ross Terrace – American Museum of Natural History (Best Water Sprinklers in the City)


The summer in NYC can get hot. What better way to beat the heat than sprinklers? One of the best kept secrets in NY is the Arthur Ross Terrace at the American Museum of Natural History—it has great fountains that kids love, and the water pools at the end, near the Rose Center for Earth and Science, so the kids also have an area to splash, play, transport water, etc. 


Alex, as evident by these photos, loves this place. He smiles from the moment he gets there. 


Alex and I decided to see how high we could get the fountains to take a basic red cup. We had some successes, and some flops too. He got so excited when the cup would fly through the air. 


We were less successful with the ball in our attempts to project it in the air. 

Amanda, after seeing several kids step on the fountain to stop it, decided she wanted to try it too. We thought it may hurt our feet, but it actually tickled. And, of course, Alex had to try it after he saw his beloved Mimi do it. 


After the fountains, Alex found his way to the pool of the water at the end. He splashed, “swam” in it, and drove another child’s dump truck through the water.


Amanda and I went to go pick up some dosas and we brought them back for lunch (there is ample eating space here).  It was such a perfect summer afternoon. 


Monday, July 28, 2014

Shepherd’s Pie with Ground Turkey


We had a bunch of leftovers the other day—corn, peas, a few carrots, ground turkey—and I was trying to think of way we could use as many of them as possible. That is when shepherd’s pie came to me. It was delicious and it used up all of our random leftovers. 


INGREDIENTS – POTATOES
1 1/2 pounds of potatoes (I used red ones), peeled and diced
1/4 cup of half-and-half
2 ounces of unsalted butter
1 teaspoon of kosher salt
1/4 teaspoon of freshly ground black pepper
1 egg yolk

INGREDIENTS – MEAT FILLING
2 tablespoons olive oil
1 cup of chopped onion
2 carrots, peeled and diced small
2 cloves garlic, minced
1 1/2 pounds of ground turkey
1 teaspoon of kosher salt
1/2 teaspoon of freshly ground black pepper
2 tablespoons of all-purpose flour
2 teaspoons of tomato paste
1 cup of chicken broth
1 teaspoon of Worcestershire sauce
2 teaspoons of rosemary
1 teaspoon of thyme
3/4 cup of fresh or frozen corn kernels
3/4 cup of fresh or frozen English peas


DIRECTIONS – POTATOES
1.           Place potatoes in a medium saucepan and cover with cold water. Set over high heat, cover and bring to a boil.
2.          Once boiling, uncover, decrease the heat to maintain a simmer and cook until tender and easily crushed with tongs, approximately 10 to 15 minutes.
3.          Place the half-and-half and butter into a microwave-safe container and heat in the microwave until warmed through, about 35 seconds.
4.          Drain the potatoes in a colander and then return to the saucepan.
5.          Mash the potatoes and then add the half and half, butter, salt and pepper and continue to mash until smooth.
6.          Stir in the yolk until well combined.


DIRECTIONS – MEAT FILLING
1.           Preheat the oven to 400 degrees F.
2.          While the potatoes are cooking, prepare the filling.
3.          Place the olive oil into a 12-inch saute pan and set over medium high heat. Once the oil shimmers, add the onion and carrots and saute just until they begin to take on color, approximately three to four minutes.
4.          Add the garlic and stir to combine.
5.          Add the turkey, salt and pepper and cook until browned and cooked through, approximately three minutes.
6.          Sprinkle the meat with the flour and toss to coat, continuing to cook for another minute.
7.          Add the tomato paste, chicken broth, Worcestershire, rosemary, thyme, and stir to combine.
8.          Bring to a boil, reduce the heat to low, cover and simmer slowly 10 to 12 minutes or until the sauce is thickened slightly.
9.          Add the corn and peas to the meat mixture and spread evenly into an 11 by 7-inch glass baking dish.
10.       Top with the mashed potatoes, starting around the edges to create a seal to prevent the mixture from bubbling up and smooth with a rubber spatula.
11.        Place on a baking sheet in the middle rack of the oven and bake for 25 minutes or just until the potatoes begin to brown.
12.       Remove to a cooling rack for at least 15 minutes before serving.


This can be rather time intensive, so save it for a weekend.  Original recipe can be found here.


Friday, July 25, 2014

Healthy Snack: Dehydrated Banana Chips


As I have mentioned before, it is a struggle to get Alex to eat anything that is not dairy or a starch. The last time we were in Vermont, his grandmother had made dehydrated banana slices—he ended up loving them. I decided to dust off the old food dehydrator and make a stock pile. We take them with us to the park now—they are a really easy snack and have no sugar added.  


You should wait till the bananas are pretty ripe, but not so ripe they are completely brown. 


I cut the bananas in slices (like you would if you were putting them on a piece of toast) and toss them in a little lemon juice. 


I then put them on the food dehydrator trays and dehydrate for about 12-15 hours.


My food dehydrator can do about 2-3 bunches at a time and I always try to do them in batches.

This is the food dehydrator I have—I love it because you get a lot of dehydrating space, but it isn’t as massive as many of the ones I have seen.

Wednesday, July 23, 2014

Cherry Cheesecake


I had a taste for cheesecake the other day, so decided to make two kinds: cherry and strawberry. I used the same base for each. But for the strawberry cheesecake topping, I made this from scratch, using the strawberries that we picked in Massachusetts. For the cherry topping, I cheated and used canned cherries. 


INGREDIENTS – CRUST
2 cups of finely ground graham crackers (about 32-35 squares)
2 teaspoons of ground cinnamon
1 stick of unsalted butter, melted

INGREDIENTS – FILLING
1 pound of cream cheese, 2 (8-ounce) blocks, softened
3 eggs
1 cup of sugar
1 pint of sour cream
1 lemon, zested
1 dash of vanilla extract

INGREDIENTS – TOPPING (Strawberry Cheesecake Only):
3 cups of mashed strawberries
1 lemon, zested and juiced
3 tablespoons of sugar


DIRECTIONS – CRUST
1.          In a mixing bowl, combine the ingredients with a fork until evenly moistened.
2.          Lightly coat the bottom and sides of an 8-inch springform pan with non-stick cooking spray. (NOTE: I used two pie plates and divided the crust and filling between the two.)
3.          Pour the crumbs into the pan and, using the bottom of a measuring cup or the smooth bottom of a glass, press the crumbs down into the base and 1-inch up the sides.
4.          Refrigerate for five minutes.


DIRECTIONS – FILLING
1.           Preheat the oven to 325 degrees F.
2.          In the bowl of an electric mixer, beat the cream cheese on low speed for one minute, until smooth and free of any lumps.
3.          Add the eggs, one at a time, and continue to beat slowly until combined.
4.          Gradually add sugar and beat until creamy, for one to two minutes.
Add sour cream, lemon zest, and vanilla. Periodically scrape down the sides of the bowl and the beaters. The batter should be well-mixed but not overbeaten. Pour the filling into the crust-lined pan and smooth the top with a spatula.
Set the cheesecake pan on a large piece of aluminum foil and fold up the sides around it.
5.          Place the cake pan in a large roasting pan (NOTE: I used a deep baking pan.)
6.          Pour boiling water into the roasting pan until the water is about halfway up the sides of the cheesecake pan; the foil will keep the water from seeping into the cheesecake.
7.          Bake for 45 minutes. The cheesecake should still jiggle (it will firm up after chilling), so be careful not to overcook.
8.          Let cool in pan for 30 minutes.
9.          Chill in the refrigerator, loosely covered, for at least four hours.
10.       Loosen the cheesecake from the sides of the pan by running a thin metal spatula around the inside rim.
11.        Unmold and transfer to a cake plate.
12.     Using a spatula spread a layer of topping over the surface.


DIRECTIONS – TOPPING
1.           In a small saucepan add all the ingredients and simmer over medium heat for five minutes.
2.           Leave to cool before spreading on cheesecake.


This was my first time making cheesecake and it was delicious! I love cheesecake in the summer because you serve it cold and it always tastes so refreshing. I also think the mark of a good cheesecake is that it tastes light and airy (even though it is anything but)—this definitely was. I highly recommend this cheesecake. 


Original recipe can be found here

Monday, July 21, 2014

Strawberry Picking – Take 2


The day we left Boston, we decided to go strawberry picking with the kids in the morning. We went to one farm, which was closed (a theme for us this summer) and quickly had to find a new farm. 


This was the last day of strawberry picking at this farm for the summer, and the berries were still great! The kids definitely sampled a few (so did the adults). 


We divided the strawberries up amongst us and then took off for NY. It was a really fun morning and tired Alex out for the long car ride back. 

The final pickings. 


 I made a strawberry cheesecake later that week  using these strawberries (recipe to come).